
BURKHARD MARTENS: THE NOBLE ART OF SOARING
- Mar 20, 2022
- 20 min read
Updated: Mar 23, 2022
[Original English below]
Bay cặp vách là một trong những kỹ năng chúng ta học khi là một phi công mới. Nhưng theo Burkhard Martens, kỹ năng cơ bản nhất sẽ đưa chúng ta từ chơi ở các đồi cát ven biển cho tới bay lên trần mây.

AI CÓ QUYỀN ƯU TIÊN BÊN PHẢI?
Khi bay cặp vách, phi công phải chịu khó quan sát để tránh va chạm. Luật giao thông giúp chúng ta tránh va chạm. Một trong những luật nói rằng phi công có vách núi ở phía tay phải có quyền ưu tiên bên phải. Một luật nữa nói rằng phi công đang cất cánh phải ưu tiên cho các phi công đang bay. Bồi dưỡng một airmanship tốt khi bay cặp vách là một phần của việc trở thành một phi công tốt.
Bay cặp vách là bay trong một vùng nâng được tạo ra bởi gió đập vào một vật cản. Các phi công bay núi đã quen với việc vật cản đó là núi, nhưng thực tế nó có thể là bất cứ vậy gì, và các phi công đã bay cặp vách của các tòa nhà, các bìa rừng, các kiện rơm và thậm chí nhiều thứ nữa.
Bay cặp vách dễ dự đoán hơn là bay thermal: khi gió gặp vật cản ở một góc vuông vừa phải sẽ có vùng nâng phía trước vật cản.
Đa số các chuyến XC bao gồm một vài đoạn bay cặp vách, và các vách núi có thể cặp vách được sẽ giúp bay nhanh hơn, đồng nghĩa với việc bay được xa hơn.
Sử dụng lực nâng của gió (dynamic lift) như thế nào
Khi bay cặp vách, chúng ta bay qua lại phía trước núi, không để gió thổi ra phía sau quá xa và luôn rẽ ra phía ngoài núi khi đổi hướng. Nếu nhìn từ phía trên thì giống như chúng ta đang bay những số 8 kéo dài.
Ở những vùng nâng lớn, đôi khi đủ để quay 360 nhưng hãy cẩn thận khi bay xuôi gió tốc độ sẽ cao và các phi công ít kinh nghiệm thường sẽ bất ngờ khi tốc độ tăng đột ngột khi đang chuyển từ ngược gió sang xuôi gió. Đâm vào núi xuôi gió thì luôn đau, cho dù địa hình như thế nào chăng nữa.
Phi công nên cố gắng duy trì trong vùng nâng tốt nhất. Điều này tùy thuộc vào độ dốc của vách núi và tốc độ gió, nhưng ở vùng núi thì thường là cách vách 20 đến 80 mét. Nếu vách là một bức tường dựng đứng và gió nhẹ, vùng nâng sẽ ở sát vách hơn bình thường. Gió càng mạnh thì chúng ta càng nên bay xa vách.
Phi công phải luôn giữ một khoảng cách an toàn với vách. Không có công thức nào cụ thể, nhưng nếu bạn có thể chắc chắn rằng mình xử lý được một cú collapse ở khoảng cách hiện tại tức là ổn.
Diều lượn cần bay xa núi hơn là dù lượn, vì chúng cần nhiều thời gian hơn để thăng bằng nếu như cánh ngoài bị nâng lên. Đầu tiên diều lượn phải tăng tốc sau đó mới quay lại được, trong khi dù lượn thì góc quay nhanh hơn. Nếu bay cặp vách mà xóc và nhiễu động thì bạn nên tìm chỗ khác để bay.
Nếu gió thổi đều vào vách thì việc bay cặp vách sẽ thư giãn vô cùng. Bay đồi cát với gió biển rất vui và có lẽ là hình thức bay dễ chịu nhất.
Địa hình ảnh hưởng đến vùng nâng thế nào
Ngọn núi lý tưởng để bay cặp vách cần rộng, cao và ít vật cản. Lực nâng tốt nhất xuất hiện khi gió vuông góc với hướng dãy núi. Nếu gió hơi chếch với núi, phi công sẽ bay nhanh hơn khi xuôi gió và chậm hơn khi ngược gió. Điều này khiến ta lầm tưởng rằng bay ngược gió nâng nhiều hơn, nhưng thực ra là vì bay xuôi gió thì nhanh hơn nên ở trong vùng nâng ngắn hơn. Các mỏm đồi tròn chỉ cặp được ở phía dưới thấp, do trên đỉnh gió sẽ thổi vòng quanh thay vì thổi lên trên. Hãy tưởng tượng nước chảy qua hòn đá tròn.
Các sườn núi thì luôn bị cắt bởi các mỏm phụ, các khe rãnh có hướng khác với sườn chính. Tại những chỗ này lực nâng sẽ khác nhau, các phi công giỏi có thể nhận ra và tận dụng.
Đa số các phi công sẽ cặp vách cho tới độ cao lớn nhất có thể. Nhưng nhiều ngọn núi không bình thường và có những đoạn bình nguyên bằng phẳng lẫn với những đoạn vách dốc. Bình thường thì vẫn có thể bay cặp vách qua những đoạn này, nhưng cẩn thận nếu không sẽ hạ cánh ở đó. Gió ở mép các bình nguyên này sẽ đẩy không khí ở bình nguyên lên, tạo nên nhiễu động và gió sau ở phía sau mép.
Cách tốt nhất để bay qua là sử dụng thermal lẫn vào dynamic lift để bay lên cao, sau đó bay trở về dãy núi chính. Bạn phải tính độ cao sao cho tới thermal tiếp theo có thể bắt được và bay cao hơn. Một lựa chọn khác là quan sát dọc dãy, có thể sẽ có một khu vực bình nguyên đủ nhỏ để bay về dãy núi chính mà không bị tụt.

BẮT VÙNG NÂNG
Vùng có thể cặp vách màu vàng, thermal có thể xuất hiện ở vùng đỏ. Nếu không có thermal, bạn soar ở vùng vàng, nhưng khi có thermal bạn có thể bay vào bắt ở vùng đỏ. Bạn có thể bay cao lên và bị dạt ra sau. Nếu trượt khỏi thermal bạn quay lại vùng vàng phía trước vách và lặp lại cho tới khi tìm được vùng nâng và lên cao.

VƯỢT DÙ KHÁC
Vượt bên phải và nếu không được thì ta không vượt. Dù đỏ phải vượt dù vàng phía bên phải. Ở Anh thì luật hơi khác và cho phép phi công vượt bên nào cũng được, miễn là không cản đường rẽ của phi công khác. Ở trong ảnh nếu vượt phải phi công sẽ bay khỏi vùng nâng và vùng nước. Vượt bên trái sẽ bay vào khoảng hở giữa phi công và vách. Quay lại sớm, không vượt nữa cũng là một lựa chọn. (Photo: Werner Luidolt)
Tránh va chạm với các phi công khác như nào
Phi công bay với vách ở bên tay phải được ưu tiên. Nhưng toàn bộ các phi công đều phải luôn để ý những người bay cùng độ cao. Trước khi rẽ, phi công phải nhìn sau để đảm bảo không ảnh hưởng tới ai khi rẽ, cũng như tránh khóa người khác lại giữa chúng ta và núi, hoặc phi công khác.
Nếu nhiều phi công cùng cặp vách hợp lý nhất là tất cả đều duy trì một khoảng cách với vách. Khi gặp người đi ngược chiều, phi công với vách ở bên trái bay vòng ra ngoài tránh nhường cho phi công kia đi thẳng. Lý do là phi công có vách ở bên phải không thể tránh phải như những người khác do vướng núi.
Một ưu điểm nữa của việc tất cả cùng bay cách núi một khoảng đó là mọi người đều có thể rẽ mà không bị va chạm với người khác đang bay phía sau và cách núi xa hơn một chút.
Sử dụng vector gió để phân tích
Lực nâng được tính toán dựa vào tốc độ gió và góc nghiêng của vách, có thể được phân tích bằng vector, vì gió là một lực tác động có hướng. Lực nâng sẽ giữ chúng ta bay được lâu hơn, còn gió ngang sẽ ảnh hưởng khi ta đi ngược gió.
Ví dụ ở hình dưới. Tốc độ gió là 25km/h ở phía chân đồi, tăng lên 40km/h ở phía trên cao. Qua phân tích vector ta có thể thấy dưới thấp ta có gió ngang 20km/h và lực nâng là 15km/h, ở đỉnh gió ngang là 30km/h và lực nâng là 26km/h.
Gió 30km/h là ở trên đỉnh, nhưng ở phía trước vách vẫn có thể bay được nếu dù có tốc độ trim speed khoảng 35-36km/h. Nhưng ở phía sau sườn núi (điểm A trong hình) khi không có lực nâng nữa, gió ngang sẽ là 40km/h – quá mạnh để bay.

PHÂN TÍCH SỨC GIÓ
Phân tích vector gió và lực nâng khi bay cặp vách (km/h). Mũi tên trắng là tốc độ gió, mũi tên vàng là gió ngang và mũi tên đỏ là lực nâng. Phía sau vách núi tốc độ gió bằng với gió nang, và không có lực nâng. Vách núi hoạt động như một venturi, làm tăng tốc độ gió lên.
Đây là tốc độ gió thật khi không có vách núi để chia nó thành lực nâng và gió ngang. Điều này cũng có nghĩa là cất cánh ở trên đỉnh là không thể trong khi bay ở phía trước sườn thì vẫn được.
Phân tích vector cũng chỉ rõ rằng, cặp vách phía trước núi chứ không phải phía trên đỉnh núi. Nếu bạn đang bay mà bị thổi lùi về sau núi, bạn sẽ chỉ có gió chứ khôg có lực nâng nữa. Và nếu gió vượt qua tốc độ tiến của bạn bạn sẽ dần dần tụt vào vùng nhiễu động phía sau đỉnh núi.
Diều lượn có tốc độ tốt hơn, trong điều kiện bay bình thường khó có thể bị thổi lùi, nhưng dù lượn thì cần đề phòng khi bay cặp vách ở gần tốc độ tối đa. Bị tụt vào vùng nhiễu động gần núi trong điều kiện gió to là rất nguy hiểm.
Khoảng cách an toàn khi cặp vách là gì?
Có nhiều yếu tố ảnh hưởng tới khoảng cách và độ cao an toàn khi bay cặp vách. Không có công thức cụ thể, nhưng một vài gợi ý sau có thể giúp bạn. Gió càng to thì khoảng cách càng phải xa. Có hai lý do: nhiễu động và dạt.
Nhiễu động: tăng lên khi gió mạnh lên. Nếu gió tăng từ 15km/h lên 30km/h, vùng nhiễu động phía sau vật cản sẽ mở rộng ra 4 lần. Một vách núi có thể cặp dễ dàng với gió 15km/h sẽ có thể không bay được với gió 30km/h – và khoảng cách an toàn của chúng ta phải tuân theo điều này.
Dạt: cũng tăng lên khi gió mạnh lên. Nếu chúng ta gặp vấn đề, cần đảm bảo rằng mình có đủ khoảng không để xử lý. Bay cặp vách gần một vách núi dựng đứng trong điều kiện gió mạnh và gặp collapse sẽ khiến chúng ta va vào vách ngay lập tức.
Bay thermal khi cặp vách như nào
Thường thì ta không thể cặp vách lên cao hơn đỉnh núi cao nhất của dãy. Để bay cao hơn thì cần tìm thermal - nhưng làm sao để tìm chúng? Đây là câu hỏi các phi công mới thường hỏi.
Đầu tiên hãy cặp vách lên càng cao càng tốt. Sau đó hãy mở rộng khu vực tìm kiếm trong vùng nâng - vùng nâng cách xa núi bao xa? Khi đã biết điều này, cơ hội tìm được thermal sẽ cao hơn, vì thermal thường mở rộng so với chiều rộng của vùng nâng.
Tín hiệu đầu tiên của thermal là lực nâng tăng lên. Khi bạn đã xác định được khu vực như vậy, hãy bay ra xa và vuông góc với vách. Nếu lực nâng không giảm đi, chúng ta có thermal.
Cách an toàn nhất là bay các vòng số 8 nhỏ trong thermal cho tới khi đạt được độ cao bằng đỉnh núi. Quay 360 khi ở thấp hơn đỉnh sẽ rủi ro vì ta có thể bị dạt vào núi.
Để bay vào lõi thermal ta tiếp tục bay số 8 cho tới khi cao hơn đỉnh, sau đó bay ngược gió cho tới khi tới rìa thermal. Giờ thì bắt đầu quay vòng 360 đầu tiên. Tiếp tục làm như vậy, với các leg ngược gió bay lâu hơn xuôi gió một chút, cho tới khi bay cao lên, giờ thì có thể để cho dù dạt theo thermal một chút. Ưu điểm của phương pháp này là chúng ta sẽ luôn ở khu vực phía đầu gió của thermal, và nếu quay trượt thì sẽ ở phía đầu gió. Điều này tốt hơn nhiều là ở phía cuối gió, nơi vừa tụt nhiều, và lại phải bay ngược gió để quay lại thermal.
Nếu gió mạnh gần với giới hạn tốc độ dù thì không nên quay 360 kể cả khi ở trên đỉnh. Bạn sẽ dễ bị thổi lùi vào vùng nhiễu động.
Chúng ta cần bao nhiêu gió để cặp vách?
Có một điểm cất cánh ở Valle de Abdalajis phía Nam Tây Ban Nha khi vách núi phía trước chỉ cao 250m và thẳng đứng. Các phi công mới thường không muốn bay với gió nhẹ ở đây nghĩ rằng họ sẽ bay về hạ luôn, nhưng các phi công già thì biết rằng chỉ cần gió 5km/h với một mặt dốc dứng cũng có thể cặp vách và giữ độ cao.
Đây là ví dụ cho việc vách núi càng thoải thì ta càng cần nhiều gió để soar, và càng dốc thì càng cần ít gió.
Cặp vách XC
Cặp vách có thể giúp chúng ta bay được nhiều hơn khi XC. Có 2 trường hợp:
Đầu tiên là lợi dụng một vách núi cạnh thung lũng, ta có thể soar với gió thung lũng ở đây và đi XC. Cặp vách lên tới độ cao lớn nhất, sau đó bay qua thung lũng và lặp lại. Lưu ý là chỉ bay được với gió mạnh, tránh rotor ở đằng sau dãy núi.
Trường hợp thứ hai là bay dọc núi với gió thổi vào, trong trường hợp này phi công XC có thể có thêm vài km.
Cặp vách với mây
Các đám mây cumulus lớn cũng hoạt động như các vật cản gió. Ta có thể bay lên cao ở mặt đón gió của thermal, nơi lực nâng tốt nhất, sau đó tiếp tục bay với dynamic lift ở mặt đón gió của mây và bay vượt lên trần mây mà không bị mất tầm nhìn. Nếu làm được như thế này bạn sẽ không bao giờ quên, nó quá là đẹp luôn.
KỸ THUẬT CẶP VÁCH

1. Khi có gió, bay số 8 trong thermal trước khi quay 360 ở đỉnh núi. Vòng quay đầu tiên luôn bay ra phía ngoài vách, nếu trượt khỏi thermal bạn không bị trượt ra sau núi. Sau vài vòng quay bạn có thể thư giãn hơn và tập trung vào quay thermal. Địa điểm: Bassano, Italy

2. Khi cặp vách thứ cấp bên cạnh thung lũng, tránh nhiễu động sau vách bằng cách bay vòng ra ngoài thung lũng mỗi khi rời vách. Bay cao lên ở A, bay vòng ra B, sau đó C… Địa điểm: Sillian, Austria.

3. Khi soar ở vách cạnh biển như Normandy, France, cố gắng giữ độ cao hơn độ cao của vách núi, nếu trượt khỏi vùng nâng nó sẽ mất hút. (Photo: Jérôme Maupoint)

4. Điều kiện để bay cặp mây là gió phải tăng dần lên và không khí phải unstable.
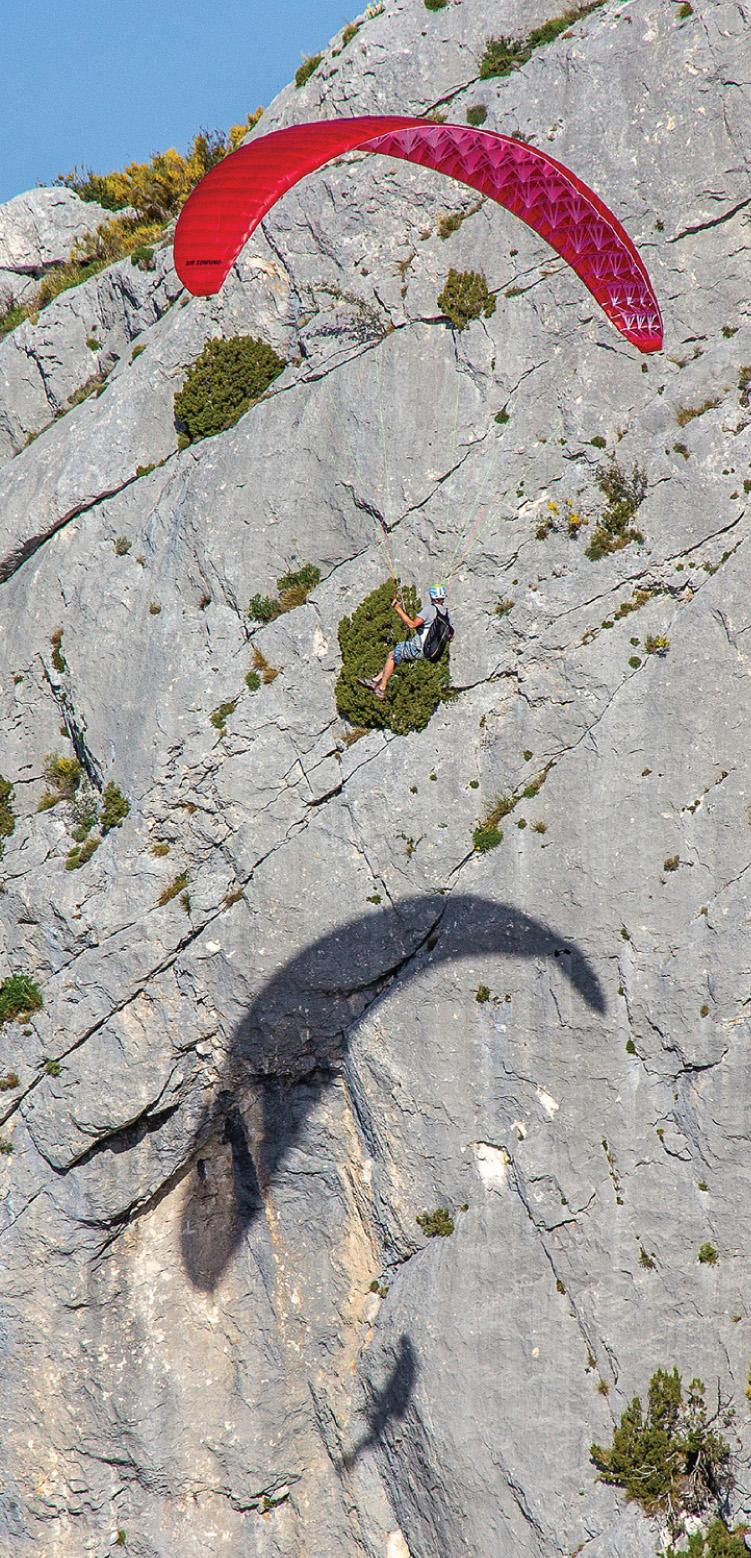
5. Kể cả khi gió nhẹ bạn vẫn cặp vách được với các vách dốc đứng. Đây cũng là một bài test thần kinh cũng như kỹ năng. (Photo: Charlie King)
[Original English]
THE NOBLE ART OF SOARING
Burkhard Martens - Cross Country Magazine Issue 225
Soaring is one of the first skills we learn as new pilots. But as Burkhard Martens explains, from playing on the sand dunes at the coast to climbing out above the cloud tops, this most basic skill can truly take us places
WHOSE RIGHT OF WAY?
When soaring, pilots must keep a good lookout to avoid colliding with each other. The rules of the air help us do that. One of them says the pilot who has the slope on their right has right of way. Another says that pilots taking off must give way to pilots already in the air. Developing good airmanship while flying on the ridge with others is part of becoming a good pilot.
Soaring means flying in a lift band caused by the wind meeting an obstacle. Alpine pilots are used to the obstacle being a mountain, but in reality it can be anything, and people have soared buildings, forest edges, stacks of baled straw and probably many more things that I haven’t heard of.
Soaring is more predictable than thermalling: as long as the wind hits the obstacle at a reasonably perpendicular angle there will be lift in front of the obstacle.
Most XC flights involve at least some soaring along the way, and good soaring ridges are a fast means of travel when we’re heading far away.
How to use dynamic lift
When soaring in dynamic lift we simply fly back and forth in front of the hill, taking care not to let the drift push us too far back and always turning away from the hill when we reverse direction. The track viewed from above should look like an elongated 8.
On big, lifty slopes the lift band may get wide enough to allow 360s but great care should be taken as the downwind drift is great and inexperienced pilots especially will often be surprised by the sudden increase in groundspeed when we go from headwind to tailwind. Hitting a slope downwind always hurts, regardless of the geology.
The pilot should try to remain in the best lift. This depends on slope inclination and wind strength, but a rule-of-thumb in mountains could be between 20 and 80 metres from the slope. If the soaring slope in fact is a vertical wall and the wind is weak, the lift will be considerably closer to the ridge than that. The stronger the wind becomes, the further away from the slope we fly.
The pilot must always keep a safe distance to the soaring slope. There are no hard and fast rules, but if you can look yourself in the eyes and honestly say that you can cope with a collapse at the current distance then you are probably OK.
Hang gliders need to keep a greater safety distance than paragliders, as they take longer to correct if the outer wing gets lifted. They must first build up some speed flying along the new heading before they can steer back out, whereas paragliders are quicker to get onto a new heading even following disturbances. It goes for both aircraft that if the soaring is rough and turbulent you’d better find somewhere else to soar.
If the wind hitting the soaring slope is laminar the flying generally becomes stress-free and extremely pleasant. Dune soaring is great fun and probably the least stressful form of flying.
How topography influences the lift band
The ideal soaring mountain is broad, free of obstacles and high. The best lift occurs when the wind is perpendicular to the mountain orientation. If the wind is angled from either side the pilot flies faster on the slightly downwind legs of the figure-of-eight, slower on the upwind legs. This may lead to the false notion that the upwind leg has better lift, but in reality the real reason is that one flies through the good bits faster on the downwind leg.
Rounded hills are only soarable low down, up high the wind flows around them rather than over. Imagine water flowing over a rounded pebble.
Mountain slopes are almost always criss-crossed by secondary spurs, landslides and gullies that are oriented differently to the wind compared to the main ridge. Along these the lift will be different, something that the good pilot notices and takes advantage of.
Most pilots aim to soar to the greatest possible altitude. But many mountains are irregularly formed and have flat sections interspersed with the more vertical parts. It is often possible to soar up past such plateaus, but care must be taken to avoid landing up there. The vertical motion of the air around the edge of the plateau will often suck in air from the plateau as well, leading to turbulence and a tailwind behind the edge.
The best way to climb past such plateaus is to use a thermal embedded in the dynamic lift to get high, then allow oneself to drift back to the main ridge again. You should aim to arrive high so that the next thermal you catch is more usable and can take you even higher still. Another option is to look further along the ridge; maybe there’s a place where the plateau is narrow enough to allow the switch back to the main ridge without risking a high landing.
CATCHING A CLIMB
The ridge is soarable in the yellow zone, and thermals may come through in the red zone. If there are no thermals you soar the yellow area, but once thermals are added into the equation you can attempt to connect with one in the red zone. You would then climb out while drifting back. If you fall out of the thermal, you’d push back into the yellow zone of lift in front of the ridge and repeat the process until you core a good climb that takes you up.
OVERTAKING
Overtaking is done to the right, and if that isn’t possible we don’t do it. Red must overtake yellow on the right. In the UK the rules are different and allow a pilot to overtake on either side, so long as they don’t block another pilot’s exit. In the photo, overtaking on the right means flying out of the main lift band and over the surf zone. Overtaking on the left would mean squeezing through the gap between pilot and cliff. Turning early and flying back, therefore not overtaking, is also an option.
(Photo: Werner Luidolt)
How to avoid colliding with other pilots
The pilot flying with the ridge to their right has the right of way. But all soaring pilots should always keep an eye out for anyone soaring at the same altitude. Before turning, pilots should look over their shoulder to make sure no one is endangered by the turn, and furthermore we should always avoid trapping anyone between ourselves and the ridge, or another pilot.
If several pilots are soaring together it makes sense that everybody maintains the same distance to the ridge. When meeting someone head on, the pilot with the ridge on the left flies a curve out from the ridge and lets the oncoming pilot pass between them and the ridge. The reason for this rule is that we always evade by flying right, however the pilot with the ridge to their right cannot do this without crashing into the mountain!
There’s a further advantage if everybody maintains a similar distance to the slope: everyone can turn when it suits themselves without risking a collision with someone flying slightly behind yet further out from the ridge.
How to use vector analysis to work out wind strength
Lift as a function of wind strength and slope inclination may be analysed using vectors, as wind is a force with a direction just like anything else we analyse with vectors. The lifting component is what keeps us airborne, and the horizontal component is our headwind when soaring.
Let us take an example. In the photo-illustration opposite we have a wind speed of 25km/h down near the foot of the ridge, increasing to 40km/h at crest level. Through vector analysis we may deduce that we get a headwind component of 20km/h and a lifting component of 15km/h down low, whereas at crest level there will be 30km/h headwind and 26km/h lifting component.
The 30km/h headwind component at ridge height, but in front of the ridge, is still just flyable if we assume that the paraglider has a trim speed of app. 35-36km/h. But right behind the crest line (point A in the photo-illustration to the right), where there is no vertical component to the wind, the headwind is suddenly 40km/h – too much for comfortable flying.
ASSESSING WIND STRENGTH
Vector analysis of the headwind and lift components when soaring in dynamic lift (in km/h). The white arrow is the wind speed, yellow is the perceived headwind and red is the lift. Right above the ridge the wind speed equals the perceived headwind, and there is no more lift to be found. Just to spice things up further the ridge even acts as a Venturi, accelerating the wind additionally.
This is the actual wind strength when there is no splitting it up into vertical and horizontal components. It follows that launching on top would be all but impossible while the flying in front of the ridge is still entirely possible.
The vector analysis makes it abundantly clear that soaring should take place in front of the ridge, not over it. If you find yourself getting pushed back over the ridge, and even worse behind it, you’ll find only wind and no more lift, and if this headwind exceeds your own airspeed you could quickly find yourself going down through the rotor behind the ridge.
Hang gliders have a considerably larger safety margin in terms of speed, and cannot be blown back under normal, flyable conditions, but paragliders are always at risk when soaring near their maximum speed limit. Going down through rotor close to the deck in strong winds is a serious matter and should not be taken lightly.
What’s a safe distance when soaring?
There are a number of factors influencing the recommendable safety distance both laterally and vertically when soaring. None of these are hard and fast rules, and nothing beats sound judgement, but having a few simple hints in mind will help you remain safe. The stronger the wind becomes, the greater the safety distance should be. There are two reasons for this, namely turbulence and drift.
Turbulence first: this is exponentially related to wind strength. If the wind increases from 15km/h to 30km/h, the turbulent area behind an obstacle grows to four times its previous expanse. It follows that a ridge that is pleasant and smooth to soar in 15km/h wind may be all but unflyable at 30km/h – and our safety distance must reflect this.
The next thing to consider is the drift, also increasing with wind strength. If we encounter bad air, and our aircraft takes a hit, we need to make sure that we have sufficient open air to operate in whilst we correct the situation. Soaring a paraglider close to a vertical cliff in strong wind and suffering a collapse could have us hanging from a rocky outcrop in no time, counting our broken bones.
How to use embedded thermals when soaring
We generally don’t get much higher than the highest peak along the ridge using solely dynamic lift. To get higher than that we need to find an embedded thermal rising well clear of the topography – but how do we locate it? This is one of the big questions new pilots always ask, and there is a lot to learn.
We start by soaring as high as we can get. Then we start to explore the horizontal expanse of the lift band – how far out in front does the lift go? Once we know this our chances of identifying a passing thermal are far greater, since the thermals will usually expand the width of the lift band considerably.
The first sign of the embedded thermal remains the increased climb rate. Once we have located such an area, we turn away from the hill and head out perpendicularly to it. If the lift doesn’t decrease at the distance we discovered above, we have got ourselves a thermal.
The safest procedure now will be to fly in small figure-of-eights in the thermal until ridge level. Circling down close to the slope is risky because the drift on the downwind leg may push us against the mountain.
To centre the thermal we continue in figure-of-eights until well clear of the top, then push out upwind until almost at the edge of the thermal. Now we may initiate our first full 360. We continue like this, with somewhat longer upwind legs than downwind, until well clear of the top – then we can allow ourselves to drift a bit with the thermal. The advantage of this method is that we always remain inside the upwind part of the thermal, and will almost surely fall out the upwind side if we get a circle wrong. This is far better than dropping out the back, where we have both strong descent and a headwind to battle in order to join the thermal again.
If the wind is close to the limit I advise against doing 360s even above the ridge. The risk of getting blown back into the rotor is simply too high.
How much wind do we need to soar?
There’s a launch in the Valle de Abdalajis in southern Spain where the cliff in front is about 250m high and virtually vertical all the way. Newcomers often don’t even bother to launch in light winds, thinking they’ll just glide down to land, but the pro’s know better: with just 5km/h wind and a vertical face it is actually possible to soar and to stay up.
This is a perfect illustration of the rule that the shallower the slope the more wind we need to soar; or the steeper it is, the less wind we need.
XC soaring
Soaring can help us make good distance on our XC flights. There are two possible scenarios.
The first method takes advantage of secondary ridges pointing into a main valley. We may use the valley wind to soar these and fly XC. We soar up each ridge to the maximum altitude, then fly a large curve out into the main valley to avoid the lee behind the little ridges. On the next ridge we repeat this process. Note that this only works in strong wind, where the rotor behind the ridges is best avoided.
The second method is more straightforward and involves blasting down long uninterrupted ridges facing into wind – in this manner the XC pilot may really get some kilometres under their belt.
Cloud soaring
Big cumulus clouds actually also work as obstacles obstructing the wind. By climbing up in the upwind side of the thermal, where the lift is usually best anyway, the pilot may manage to connect with the dynamic lift on the side of the cloud and thus climb to well above cloudbase without ever losing visual reference. Once you have tried this you won’t forget it – it’s spectacular.
SOARING TECHNIQUES
1. When windy, fly thermals in figure-ofeights before starting to 360 above the ridge top. The first circle should always be away from the ridge, so if you fall out you don’t drop behind the ridge. After a few turns you can relax and concentrate on climbing. Location: Bassano, Italy
2. When soaring secondary ridges in a large primary valley, avoid the lee behind the ridges by flying a large curve out into the main valley every time you leave a ridge. Build height at A, fly a curve to B, then to C etc. Location: Sillian, Austria.
3. When soaring coastal cliffs like these in Normandy, France, aim to always stay above the height of the cliff – once you drop below the lift can disappear quickly. (Photo: Jérôme Maupoint)
4. Prerequisites for cloud soaring are that the wind must increase around cloudbase level and the air mass must be unstable.
5. Even in very light winds you will often find it is possible to soar steep cliffs in the mountains if you tuck right in close. This can be a test of nerve as well as skill. (Photo: Charlie King)


